| |
We hope you enjoy "Project Rock Ripper". We started this project as rock crawling newbies and still have a lot to learn. Throughout the project pages, you will see what we did with our truck and we will also try to list some alternatives to get the job done. Our hope is that by providing some alternate methods to acheive the same end goal, more people will tackle a project like this and get into crawling! |
| |
      |
MOUNTING THE SERVOS
As you will recall, in Stage 2 of the project we locked
the differentials of the front and rear axles. By doing this, we knew
we would have to add four wheel steering to our truck. Luckily, the
front and rear axles from the Clod donor truck are identical and also
feature upper brace mounts that will serve as a mounting point for our
servos.
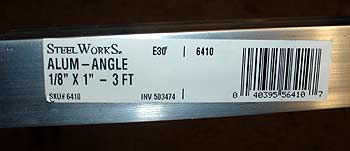
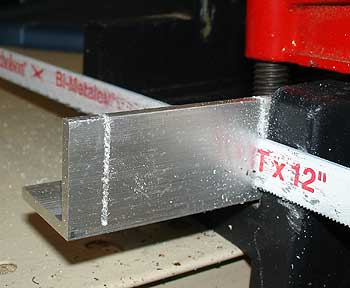
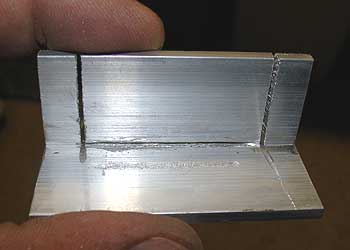
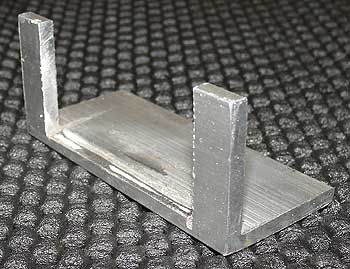
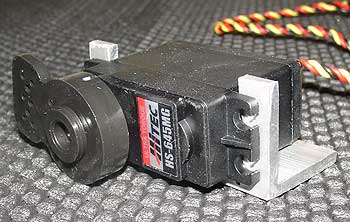
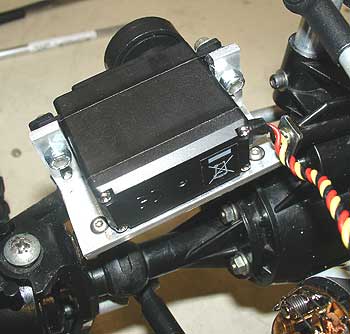
Creating servo mounts was pretty easy. We started with some 1" x 1" x 1/8" thick, 90- degree angled aluminum stock. This material was easily obtained from our local hardware store. We measured the space allowed on our upper axle brace mounts and measured a servo. It would be a close but perfect fit. The aluminum angle material was cut using a hack saw and a miter box. Nothing overly fancy but it worked! We cut two slots in the piece where the servo mount come through and then cut the piece to length. A metal file was used to get rid of the rough edges the hack saw left. We then took our Dremel and a thin cutting wheel and cut along the inside edge of the servo opening. This weakened the material enough that a couple of twists with a pliers snapped out the center section. Once we had the center section removed, we again used our metal file to clean up the rough stuff and then fit our servo into the hole. With the servo in place, we marked where the mounting holes needed to be drilled and headed to the drill press. After checking that our servo mounting holes were drilled properly by doing another test fit of the servo, we placed the mount onto the upper axle brace and marked our mounting hole locations. Again, back to the drill press. We installed the servo to the mount using the rubber mounting inserts that came with the servo. Elastic locking nuts were used to mount the servo to the brace and to mount the brace to the axle. Once we were satisfied with the fit of the piece, we removed it from the truck and used it to create another identical servo mount for the other axle. While this piece ended up looking a little "unfinished" due to the hack saw marks etc, it looked great once it was mounted. Most of our saw marks were hidden by the servo! SERVO SAVERS
To protect our HiTec metal Gear servos, we opted for Kimbrough Heavy Duty Servo Savers (#124). Installation is simple, just select the correct spline adaptor and screw them on. Once we got them centered and our steering links mounted, we used some blue thread-locker on the saver screw to keep it snug and in place.
Alternatives to Making Your Own Servo Mounts - RCGuy Steering Kit Click here to check out STAGE 7 of Project Rock Ripper .....Electronics. 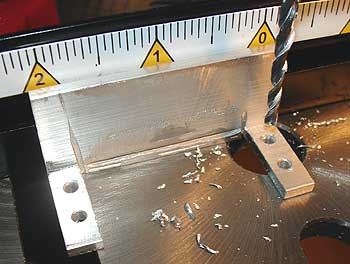 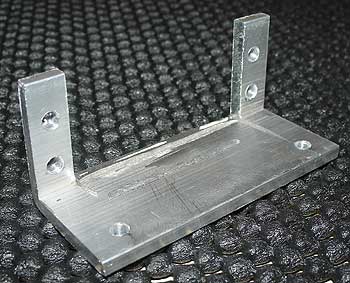 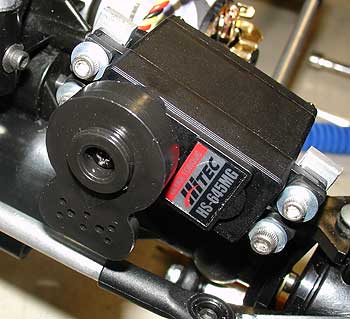 |
© Copyright
2001-2006 Beat Your Truck. Site best viewed at 800x600 or higher with Internet Explorer 5.5 or higher.
Advertise with Beat Your Truck * Donate to Beat Your Truck
Advertise with Beat Your Truck * Donate to Beat Your Truck