PROJECT "FULL SPEED
AHEAD" FACTORY TEAM RC18T
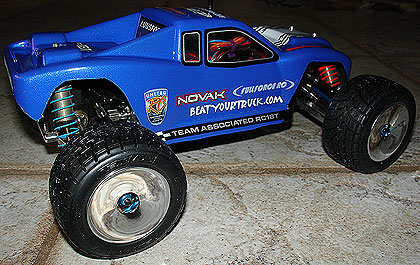
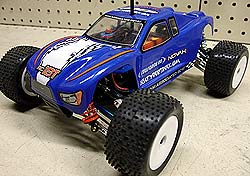
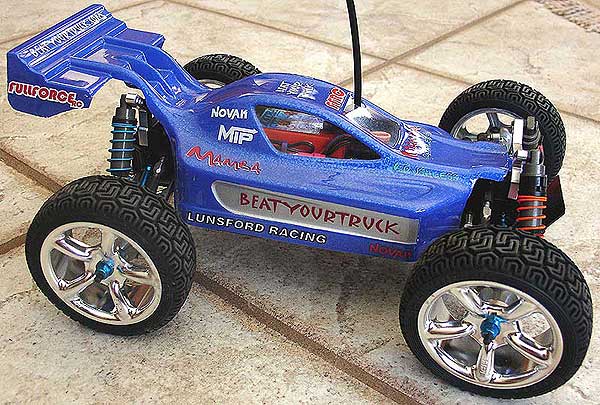
The Associated RC18T is one of the latest entries into the 1/18th
scale mini-truck market. There is no doubt that AE did their homework
with this little tyke however as with any truck, there is room for
improvement. Project Full Speed Ahead is all about toughening up the
RC18T and making it a more reliable bashing machine.
Project FSA will be loaded with premium hop-ups from FullForce RC,
Lunsford Racing and other well known and respected RC manufacturers.
FullForce RC in particular has really gotten behind the RC18T and
offers a TON of goodies for the little pocket rocket. We will be utilizing
everything they have to offer.
First things first. What to buy? The RTR or the Factory Team version?
With the numerous upgrades we were planning on installing, the Factory
team version of the RC18T made sense. We were going to use all of
our own electronics and install a pile of other goodies so why not
do it while we built the truck from scratch?
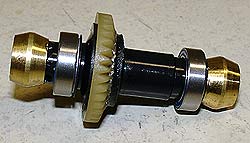 After
talking to some friends in the industry, it became apparent that some
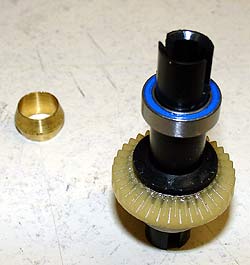
modifications to the differentials would be required. The RC18T is
known for popping diff's and we wanted to prevent this, especially
as we would be putting MAMBA power through them. To strengthen the
diff's, we added some shims to get the pinion and ring gear as close
as we could for maximum gear mesh. We also beefed up the out drives.
A quick trip to the hardware store and we had a handful of 5/16 compression
sleeves that fit perfectly over the out drives, preventing them from
expanding and allowing the dog bones to escape. To hold them in place,
we applied a small amount of CA glue between the sleeves and the out
drives.
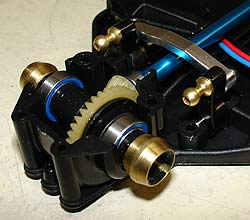 While
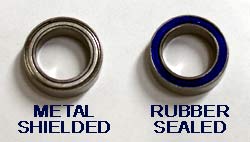
building the diff's, the first FFRC upgrade we applied were super
smooth rubber sealed bearings. Out with the metal shielded bearings
that came with the kit and in with some quality. Anytime we install
new bearings, we always take the time to rotate each one and get a
feel for it. Is it smooth? Does it need a little oil? The FFRC bearings
required no extra oil and felt smooth as silk right out of the package.
The kit comes with 15 rubber sealed bearings, enough to replace every
bearing in the truck. All popped right into place and fit beautifully.
Quality bearings will reduce resistance in the drive system and add
to battery life. Rubber sealed bearings do a better job of keeping
dirt out and oil in versus inferior metal shielded bearings.
On to the steering assembly! For the steering servo, we opted for
a simple yet effective Airtronics. It was a great fit and all the
required parts to make it work were included in the Factory Team kit.
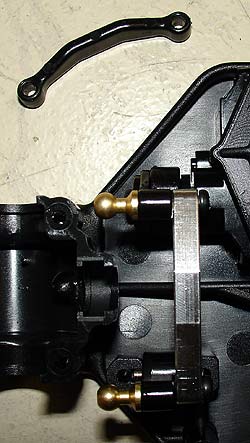
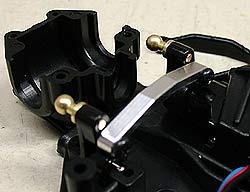
The steering link that comes with the kit is made from plastic and
is doomed to wear prematurely and increase steering slop. That's not
cool especially when we plan on our little truck hitting some substantial
ground speeds. FFRC offers an excellent upgrade with their T6 6061
aluminum steering link. It fit perfectly into place and will certainly
provide a definitive steering system for many miles to come.
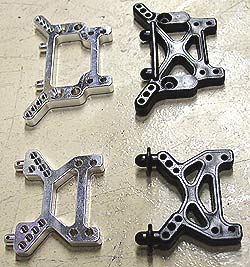 FFRC
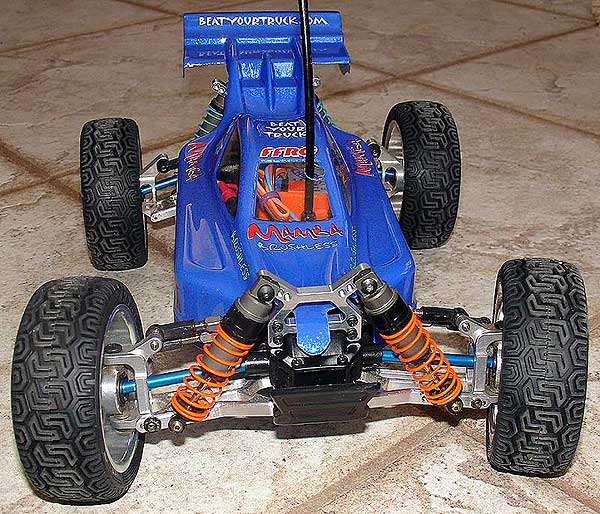
offers some very high quality T6 6061 aluminum shocks towers for the
front and rear of the truck. They offer several additional mounting
positions for the upper shock mounts giving greater ability to tune
the trucks suspension. The lack of sharp edges and use of smooth radiuses
add strength to the towers and will reduce the chance of breakage.
Both the front and rear shock towers fit into place without any trouble.
Besides a high level of functionality, they also take things up on
a notch on the bling scale and have a very nice polish to them right
out of the package.
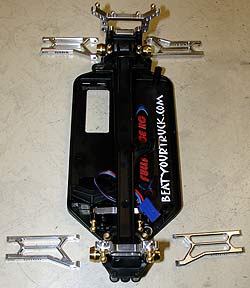
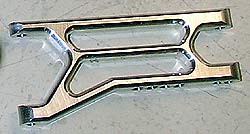 The
next stage of our build brought us to the installation of the suspension
arms onto the chassis. A cool feature that AE designed into the truck
is that the front and rear arms are identical. That means easier ordering
and fewer parts for the LHS to keep on their shelf. FFRC to the rescue
once again. They offer some exquisitely made T6 6061 aluminum suspension
arms for the RC18T. No sharp edges, smooth corners and an almost chrome
like shine kicks the little truck up to a new level of durability
and looking good. Each arm has four lower shock mounting positions
giving you more than enough options in the suspension setup department.
Fit and finish on the arms is A+.
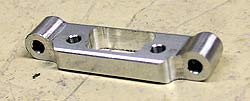 Along with suspension arm mounting goes the rear pivot block. In
plastic form, it is a sloppy mess waiting to happen. FullForce has
the answer with a T6 6061 aluminum rear pivot block to keep the arms
inline and without slop. The front pivot is actually integral to the
front bumper and is not a separate item like the rear pivot. We used
the stock front bumper on our truck….for now anyway.
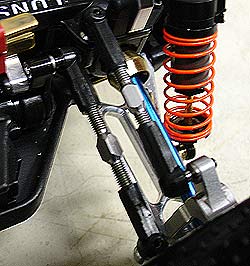 Hooray!
The most excellent postal delivery person (sorry for the Bill and
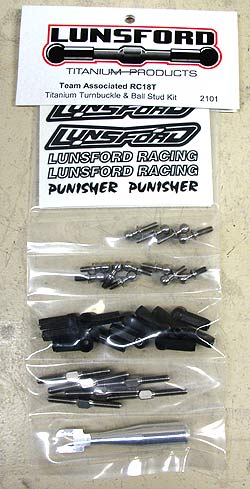
Ted flashback) delivered our Lunsford goodies just in time! We opted
for the Lunsford titanium turnbuckle and ball stud kit. The Factory
Team RC18T comes with titanium turnbuckles but we heard that they
were too long and they would have to be cut down in order to provide
any adjustment. Chop up brand new titanium turnbuckles? Screw that!
The better solution is to just use the right parts. As with every
BYT truck, one of the very first upgrades is some Lunsford backbone.
The upgrade included some slick little ball cups with holes in the
ends. What are the holes for? So you can slide your allen wrench through
and remove the ball without having to pop off the plastic rod end.
Big deal? It really is. The fewer times you remove and reinstall the
ball ends from the ball studs, the tighter they will stay and frustrating
pop offs will be less likely. This is a small thing but important!
You also get a sweet little wrench to use when assembling and adjusting
the new tb's. The Lunsford stuff mated beautifully with the FFRC goods
and a high performance marriage was at hand.
 Side note on turnbuckle assembly: the Associated RC18T instructions
give lengths that the turnbuckles should be built to and they are
wrong. The measurements are much too short!
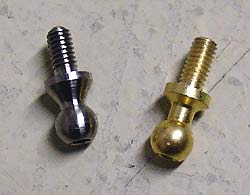
We also installed Lunsford Shock mounting ball studs and they are
exquisite little pieces of work. There is some serious attention
to detail with the super nice threads and the radius edges, unlike
the stock balls with sharper corners (sharper corners are more
likely to snap).
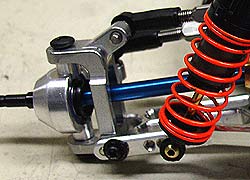
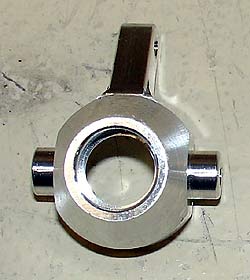
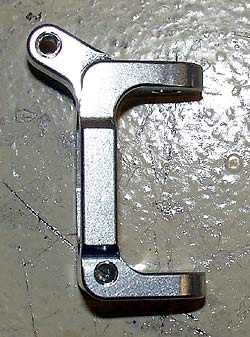
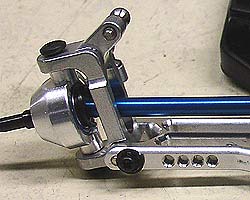 Further
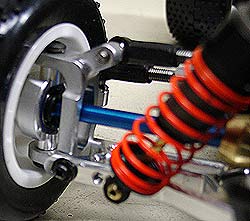
suspension upgrades included T6 6061 aluminum c-hubs and T6 6061 aluminum
steering blocks. They fit together like a hand into a glove and mounted
to the suspension arms with great accuracy. The hinge pins slid smoothly
into place and everything was really starting to come together! The
suspension in the RC18T looks kick butt at this point. FFRC did not
offer rear axle carriers. They were the only remaining components
made of plastic in the suspension system!
UPDATE: FFRC rear carriers are now available!
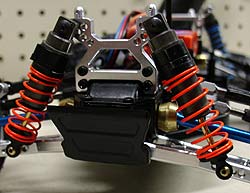 Finishing
the suspension required building the aluminum threaded shocks from
AE and installing them. Upon opening the package, we were very disappointed.
The shocks in the Factory Team kit are cheesy at best. Light duty
shocks with wimpy springs. The lower shock caps "snap" into
place...no threads. That is not good and we were not going to put
them on our sweet looking ride! Hmmm? Perhaps these spare aluminum
Mini-T shocks will fit? Nah…that
would be too easy. Oh yeah, they fit! We ended up installing a
set of Team Losi aluminum shocks on our RC18T and they work great.
Some minor modifications were needed to mount them (primarily removing
the pivot balls from the lower shock ends) and they were a direct
fit. The Mini-T shocks are a little longer than the AE units but
the numerous mounting positions offered by the FFRC shock towers
and suspension arms remedied the situation! This was an unplanned
but great upgrade to the project truck.
 It's
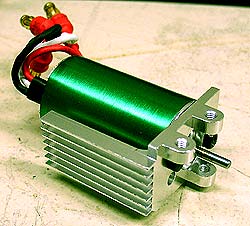
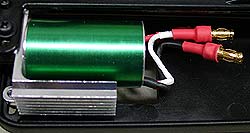
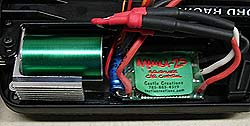
motor time! Our choice for motor was the 5400kv Mamba brushless system
from Castle Creations. It is compact and super powerful. A perfect
match for our project as space is a little tight on the RC18T and
we did not want to sacrifice power. The Factory Team kit comes with
an aluminum motor mount with cooling fins. Cool eh? Well, FFRC also
has a T6 6061 aluminum motor mount with cooling fins. What's the difference?
Why did we go with the FFRC unit rather than the included AE mount?
The answer is simple. The AE cooling fins are vertical and not terribly
conducive to airflow. The FFRC mount has horizontal cooling fins and
the air flows over them with ease and greater contact. Theoretically
it should cool the motor better than the AE mount. Do you see motorcycle
engines or lawnmower engines with vertical cooling fins on the cylinder
heads? Nope. They are horizontal. It makes sense to us! The Mamba
was able to find a nice set of holes to mount to and the look of that
green motor can in the natural/silver aluminum mount brought visions
of great speed to our heads!
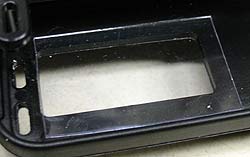
Before mounting the motor and motor mounting plate into the chassis,
we decided to seal up a hole in the chassis that allows larger motor
cans to fit. After all, there was no reason to have a big rectangular
hole in the chassis to let dirt, grime and moisture into the trucks
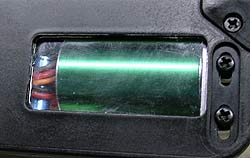
interior. We chopped a small piece of Lexan and CA'ed it into the
chassis to help keep the bad stuff out. It looks pretty sweet, almost
like a window to the underside of the Mamba. The clear, see through
property will go away soon, especially after a few high speed runs
in the gravel pits!
 The
last piece of our project puzzle would be a receiver. While at the
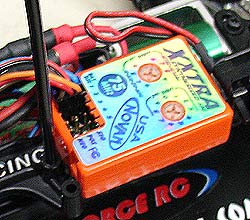
LHS, we immediately went to the Novak XXL, the same RX we used in
our Project Rocket Ship Mini-T. It is small and has worked very well
for us. The XXL retails for about $60 and then you have to buy a crystal
for it. Our LHS only has crystal sets and that would have cost us
$15. So we would have $75 tied up in a compact high quality FM receiver.
Not too bad really. Then the handy dude behind the counter said why
not upgrade to the synthesized Novak? That sounded expensive! When
in reality, it was $98, $23 more than the XXL setup and we would have
infinite control over what frequency we would run. No matter where
we were or who we were running with, we would always be able to run
our truck! The Synthesized Novak combined with our JR Xs3 would hand
us every possible FM frequency. That was an easy up sell and that
is what we bought.
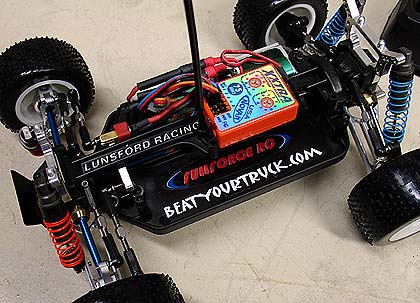
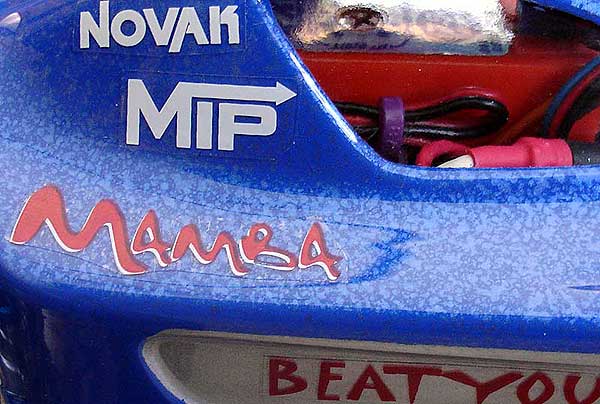
We mounted the Novak to the upper support bar on the truck, plugged
everything in and set the frequency. Bingo! It worked without flaw
and only took a few seconds to match up to our JR transmitter.
After programming the Mamba, charging up some batteries and double-checking
our work, the final touch was a sweet carbon fiber battery strap
from FFRC. Talk about icing on the cake!
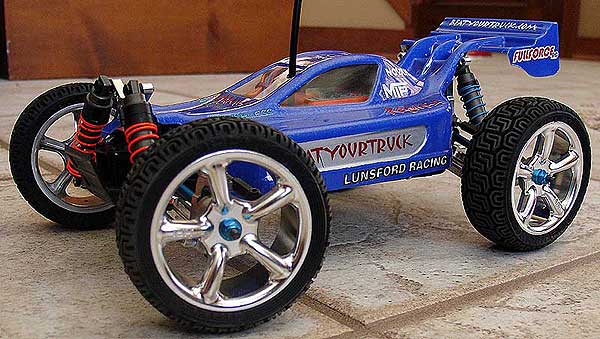
Finally, it was time to hit the street and the dirt. Project Full
Speed Ahead was about to live up to its name.
TIME TO DRIVE
The RC18T is an absolute dream to drive. It is so far beyond the Mini-T
it is not even funny. Don't get us wrong. We love the Mini-T. However
having four wheel drive makes driving a little pocket rocket like
this much easier!
The 5400kv Mamba provides a nice balance of power and speed and seems
to be a perfect match to AE's smallest truck. We powered the Mamba
with a variety of batteries including: Apogee 2 cell and 3 cell LiPo's
(from PFM
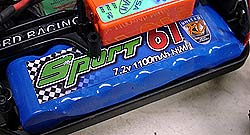
Distribution) and a "Sport
61" NiMH 6-cell Pack from United
RC. Obviously the LiPo's provided the most punch and run time
(that will always be the case when comparing LiPo to NiMH) however
we were quite impressed with the URC
Sport Pack.
The United
RC Sport 61 Pack delivered excellent power and run times of around
10-15 minutes. That is very respectable especially when we were really
driving the truck hard. The best thing about the URC Sport pack is
that they can be bought for under $11!! Yeah, we said $11! That's
not a typo. At that price, you can afford to keep a few packs on hand
to keep the fun going for a long time between recharge stops. The
Sport pack is built with 2/3a NiMH cells and have a high discharge
rate which means POWER!! These are pro built packs by an ISO9001 company,
you can be assured that every pack is quality.
UPDATE: We have charged the URC
Sport 61 pack well over twenty times so far and it REALLY started
to come alive after the 4th or 5th charge. NiMH packs often need a
few charge cycles to start hitting their peak and that was the case
with the URC
Sport 61. It charges beautifully and delivers non-stop power right
up until it drops off hard/is out of juice, exactly what you want
a battery to do. Kudos to United RC for offering a powerful, inexpensive
pack like this for the RC18T. We highly recommend it.
We slammed the little dude in the dirt, specifically around the BYT
dirt track. The BYT track is perfect for 1/18 scale trucks and even
delivers some decent 1/10 scale truck driving fun. It is an oval design
with a center cross over section. The track features a lot of jumps
(some 3+ foot high), washboards, berms and straight-aways. The truck
handled this without any trouble and could have handled more.
It is a treat to see the little guy LAUNCH whenever the trigger is
pulled. The fresh step pin tires combined with a sweet suspension
and four wheel drive made for a dirt rocket! Our track is hard packed
dirt and the RC18T was right at home on this surface. However after
about 4 hours of track time, the tires were getting pretty tired and
hooking up became more of a problem. It is no wonder why guys who
race go through tires so fast!
The BYT track is amidst a wooded lot and the occasional contact with
trees and other immovable objects is not uncommon. Sadly the RC18T
was being driven by a bad driver and often found itself banging into
stuff it should not have. Not a thing was broke during any of the
impacts. The only real damage was a shock that popped off and a bent
hinge pin (stock hinge pins were used......dang it I knew we should
have ordered the Lunsford ones).
Being that the tires were starting to loose their grip in the dirt,
we felt it was a good time to hit the street and see what it could
do on the REALLY hard stuff! The low center of gravity and wide stance
make running on the street a blast. Just know that it will wreak havoc
on your tires and a set of street meats is best for this operation.
SUMMARY
We are very pleased with our project truck and the only thing we really
NEED to do is upgrade the diffs to the new MIP Super Diff's when they
come out. Our diff modifications have held up so far but we think
it is only a matter of time before they give out. If you have a RC18T,
it is time for you to get your paws on the upgrades we have shown
you here. The FFRC goodies are top notch on quality and performance.
You can't complain about their prices either. The value ratio is very
high. Same deal with the Lunsford kit. Nothing short of excellent.
The Mamba system works very well. We all learned this with Project
Rocket Ship Mini-T and that is why we did not talk about it too much
here. The Novak synthesized receiver is awesome. Small yet powerful
FM reliability. The PFM LiPo's provided OOODLES of power as always
and again, for the money we were very impressed with the Sport pack
from United RC. Great stuff by all. Try any of it. We are certain
you will agree.
If you don't have a RC18T yet, get busy. It is an excellent truck
and with industry leading companies like FullForce RC, Mamba and Lunsford
offering specific goodies for it, your upgrade options are plentiful.






 After
talking to some friends in the industry, it became apparent that some
modifications to the differentials would be required. The RC18T is
known for popping diff's and we wanted to prevent this, especially
as we would be putting MAMBA power through them. To strengthen the
diff's, we added some shims to get the pinion and ring gear as close
as we could for maximum gear mesh. We also beefed up the out drives.
A quick trip to the hardware store and we had a handful of 5/16 compression
sleeves that fit perfectly over the out drives, preventing them from
expanding and allowing the dog bones to escape. To hold them in place,
we applied a small amount of CA glue between the sleeves and the out
drives.
  While
building the diff's, the first FFRC upgrade we applied were super
smooth rubber sealed bearings. Out with the metal shielded bearings
that came with the kit and in with some quality. Anytime we install
new bearings, we always take the time to rotate each one and get a
feel for it. Is it smooth? Does it need a little oil? The FFRC bearings
required no extra oil and felt smooth as silk right out of the package.
The kit comes with 15 rubber sealed bearings, enough to replace every
bearing in the truck. All popped right into place and fit beautifully.
Quality bearings will reduce resistance in the drive system and add
to battery life. Rubber sealed bearings do a better job of keeping
dirt out and oil in versus inferior metal shielded bearings.
 FFRC
offers some very high quality T6 6061 aluminum shocks towers for the
front and rear of the truck. They offer several additional mounting
positions for the upper shock mounts giving greater ability to tune
the trucks suspension. The lack of sharp edges and use of smooth radiuses
add strength to the towers and will reduce the chance of breakage.
Both the front and rear shock towers fit into place without any trouble.
Besides a high level of functionality, they also take things up on
a notch on the bling scale and have a very nice polish to them right
out of the package.
 The
next stage of our build brought us to the installation of the suspension
arms onto the chassis. A cool feature that AE designed into the truck
is that the front and rear arms are identical. That means easier ordering
and fewer parts for the LHS to keep on their shelf. FFRC to the rescue
once again. They offer some exquisitely made T6 6061 aluminum suspension
arms for the RC18T. No sharp edges, smooth corners and an almost chrome
like shine kicks the little truck up to a new level of durability
and looking good. Each arm has four lower shock mounting positions
giving you more than enough options in the suspension setup department.
Fit and finish on the arms is A+.
  Along with suspension arm mounting goes the rear pivot block. In
plastic form, it is a sloppy mess waiting to happen. FullForce has
the answer with a T6 6061 aluminum rear pivot block to keep the arms
inline and without slop. The front pivot is actually integral to the
front bumper and is not a separate item like the rear pivot. We used
the stock front bumper on our truck….for now anyway.
 Hooray!
The most excellent postal delivery person (sorry for the Bill and
Ted flashback) delivered our Lunsford goodies just in time! We opted
for the Lunsford titanium turnbuckle and ball stud kit. The Factory
Team RC18T comes with titanium turnbuckles but we heard that they
were too long and they would have to be cut down in order to provide
any adjustment. Chop up brand new titanium turnbuckles? Screw that!
The better solution is to just use the right parts. As with every
BYT truck, one of the very first upgrades is some Lunsford backbone.
The upgrade included some slick little ball cups with holes in the
ends. What are the holes for? So you can slide your allen wrench through
and remove the ball without having to pop off the plastic rod end.
Big deal? It really is. The fewer times you remove and reinstall the
ball ends from the ball studs, the tighter they will stay and frustrating
pop offs will be less likely. This is a small thing but important!
You also get a sweet little wrench to use when assembling and adjusting
the new tb's. The Lunsford stuff mated beautifully with the FFRC goods
and a high performance marriage was at hand.
  Side note on turnbuckle assembly: the Associated RC18T instructions
give lengths that the turnbuckles should be built to and they are
wrong. The measurements are much too short!
  Further
suspension upgrades included T6 6061 aluminum c-hubs and T6 6061 aluminum
steering blocks. They fit together like a hand into a glove and mounted
to the suspension arms with great accuracy. The hinge pins slid smoothly
into place and everything was really starting to come together! The
suspension in the RC18T looks kick butt at this point. FFRC did not
offer rear axle carriers. They were the only remaining components
made of plastic in the suspension system!
 Finishing
the suspension required building the aluminum threaded shocks from
AE and installing them. Upon opening the package, we were very disappointed.
The shocks in the Factory Team kit are cheesy at best. Light duty
shocks with wimpy springs. The lower shock caps "snap" into
place...no threads. That is not good and we were not going to put
them on our sweet looking ride! Hmmm? Perhaps these spare aluminum
Mini-T shocks will fit? Nah…that
would be too easy. Oh yeah, they fit! We ended up installing a
set of Team Losi aluminum shocks on our RC18T and they work great.
Some minor modifications were needed to mount them (primarily removing
the pivot balls from the lower shock ends) and they were a direct
fit. The Mini-T shocks are a little longer than the AE units but
the numerous mounting positions offered by the FFRC shock towers
and suspension arms remedied the situation! This was an unplanned
but great upgrade to the project truck.
 It's
motor time! Our choice for motor was the 5400kv Mamba brushless system
from Castle Creations. It is compact and super powerful. A perfect
match for our project as space is a little tight on the RC18T and
we did not want to sacrifice power. The Factory Team kit comes with
an aluminum motor mount with cooling fins. Cool eh? Well, FFRC also
has a T6 6061 aluminum motor mount with cooling fins. What's the difference?
Why did we go with the FFRC unit rather than the included AE mount?
The answer is simple. The AE cooling fins are vertical and not terribly
conducive to airflow. The FFRC mount has horizontal cooling fins and
the air flows over them with ease and greater contact. Theoretically
it should cool the motor better than the AE mount. Do you see motorcycle
engines or lawnmower engines with vertical cooling fins on the cylinder
heads? Nope. They are horizontal. It makes sense to us! The Mamba
was able to find a nice set of holes to mount to and the look of that
green motor can in the natural/silver aluminum mount brought visions
of great speed to our heads!
 The
last piece of our project puzzle would be a receiver. While at the
LHS, we immediately went to the Novak XXL, the same RX we used in
our Project Rocket Ship Mini-T. It is small and has worked very well
for us. The XXL retails for about $60 and then you have to buy a crystal
for it. Our LHS only has crystal sets and that would have cost us
$15. So we would have $75 tied up in a compact high quality FM receiver.
Not too bad really. Then the handy dude behind the counter said why
not upgrade to the synthesized Novak? That sounded expensive! When
in reality, it was $98, $23 more than the XXL setup and we would have
infinite control over what frequency we would run. No matter where
we were or who we were running with, we would always be able to run
our truck! The Synthesized Novak combined with our JR Xs3 would hand
us every possible FM frequency. That was an easy up sell and that
is what we bought.
